This may be fine for some large organisations, but is irritating for those of who are, for example, in an institute which is too small to qualify for the list, such as Durham University.
In order to install the full set of connection files, filters and styles you have to, at least on a Windows machine, modify the installation of Endnote.
To start, go to Control Panels | Add or Remove Programs, and wait a while whilst your computer generates the list.
Scroll down the list until you find your Endnote install, and click on it. Click on Change.

The Endnote installer will launch, and you should get to the Application Maintenance dialog.

Select Modify and click Next. The Select features dialog should appear.
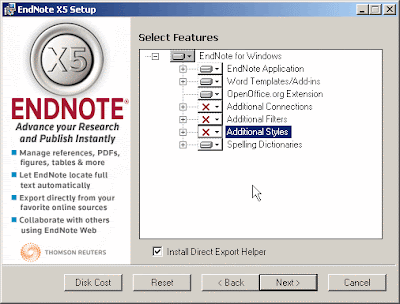
The three components of interest here are the Additional connections, Additional Filters and Additional Styles bits. These are marked with red X’s to show they are not installed.
To install, click on the drop down by these additional features and select Entire Feature will be Installed….
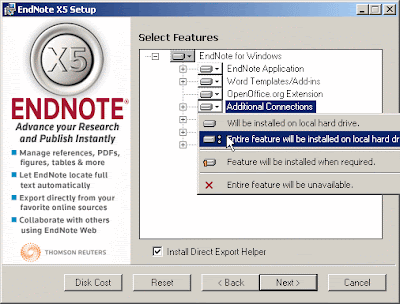
Do this for each feature (it is best to do all of them) and click next. Click Next on the next dialog box and the features will then be installed. It may well take a few minutes before this is completed.
If your Endnote is delivered via MDS, all the available files will be deployed.
If you are uncertain which files are installed, go in Endnote to Tools | Online Search
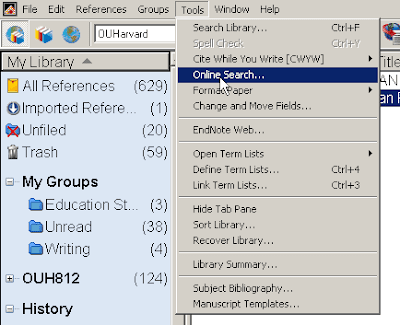
In the Choose a Connection dialog, scroll down to see if Durham U is present.

No comments:
Post a Comment